图床的选择与设置
提示
利用GitHub + jsDelivr + VSCode + PicGo搭建高效免费图床。
# 前言
不少图床都是免费的,例如:SM.MS (opens new window)、聚合图床 (opens new window)、路过图床 (opens new window)等等。目前,我的做法是将可以公开的图片存储到Github上,否则存储到SM.MS上(注意:免费用户有一定的存储限制 (opens new window))。
# 配置
我这边采用了GitHub + jsDelivr + VSCode + PicGo的方案来构建图床。主要分为以下两个步骤:
# 1. Github新建仓库+Token生成
Step1: 访问并创建Github账号 (opens new window)
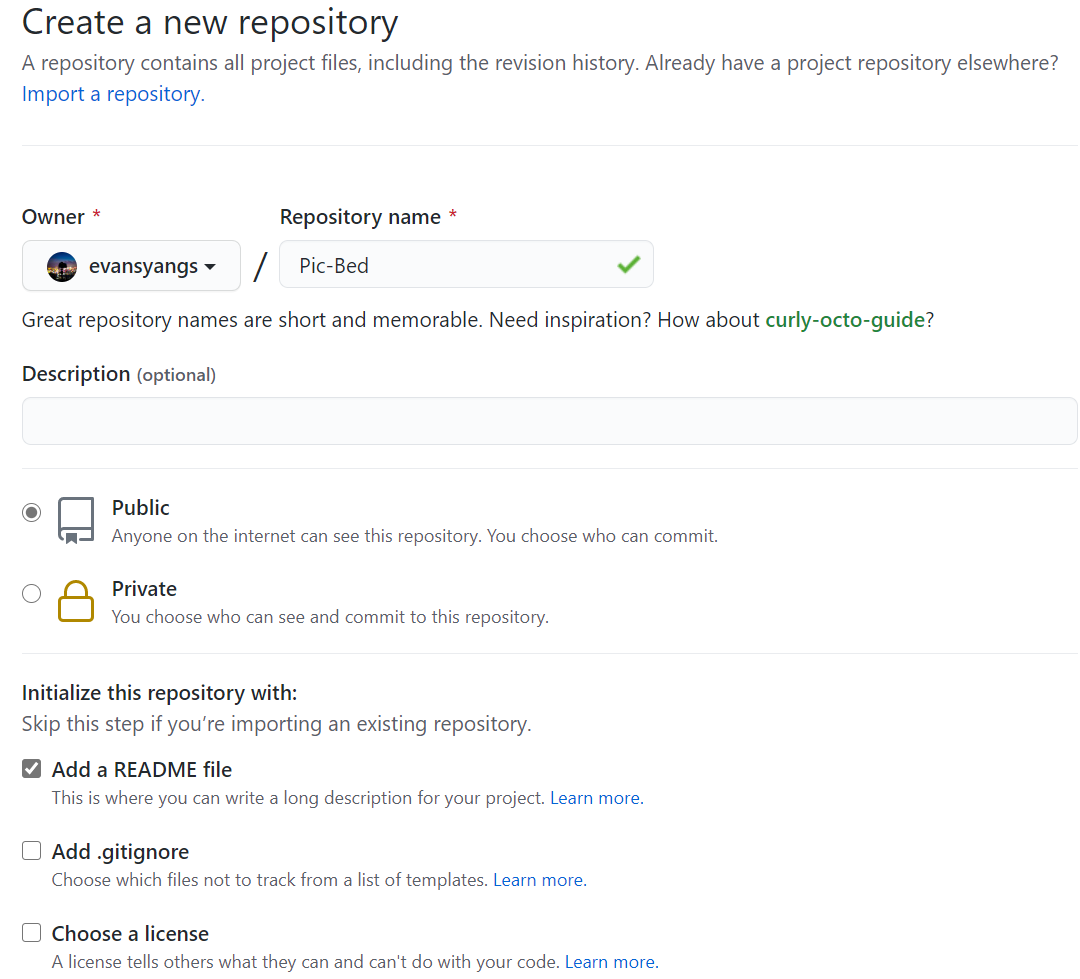
Step2: 新建Github仓库
注意
需要将仓库设置为Public,建议不要上传可能会泄露个人隐私的照片。
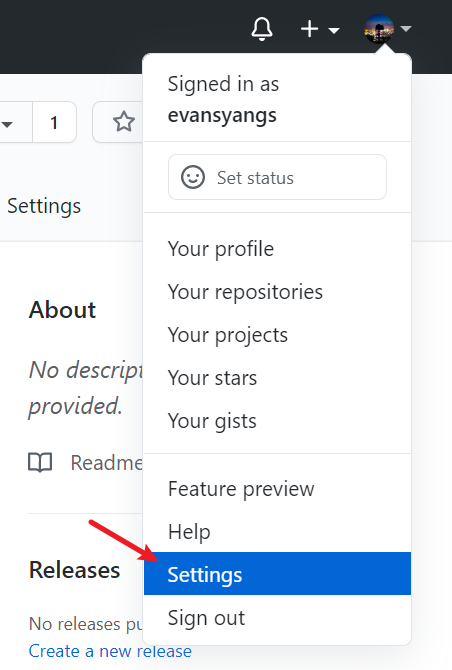
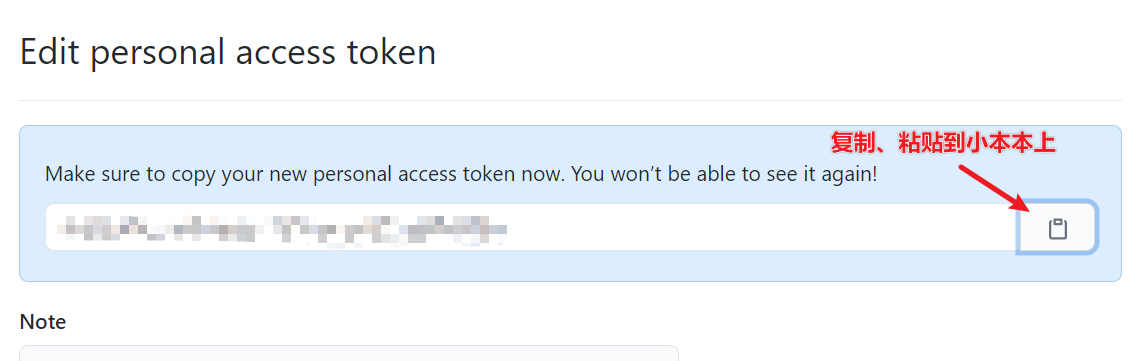
Step3: 生成Token
主页右上角的Settings。
左侧栏目找到Developer settings并点击。

点击Personal access tokens并勾选repo。
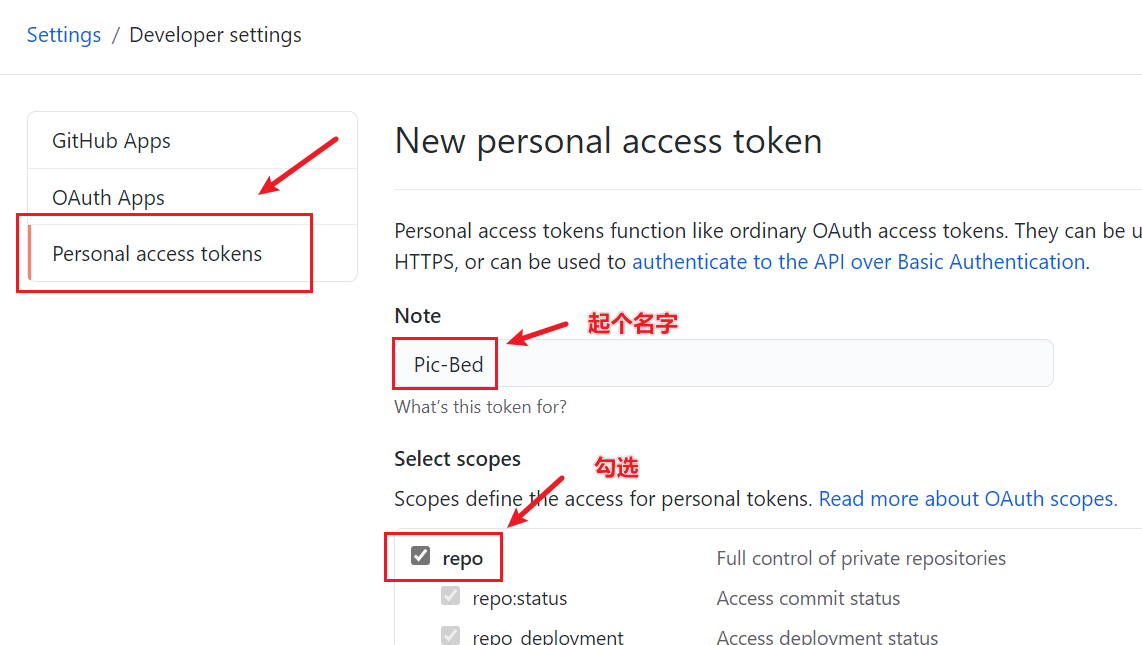
得到Token,复制、粘贴到小本本上备用。
# 2. VSCode安装+PicGo插件
Step1: 下载并安装Visual Studio Code (opens new window)
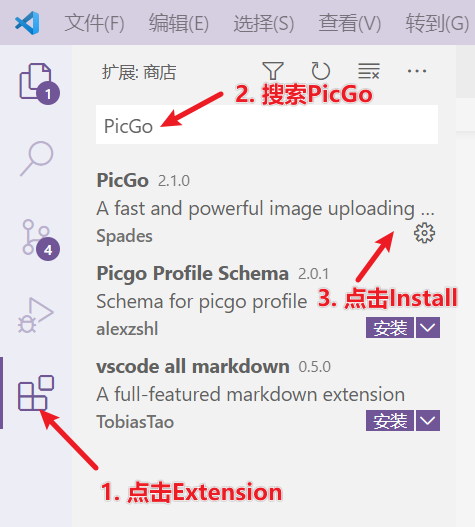
Step2: 安装插件
在扩展商店中搜索PicGo插件即可。(下图为已安装状态)
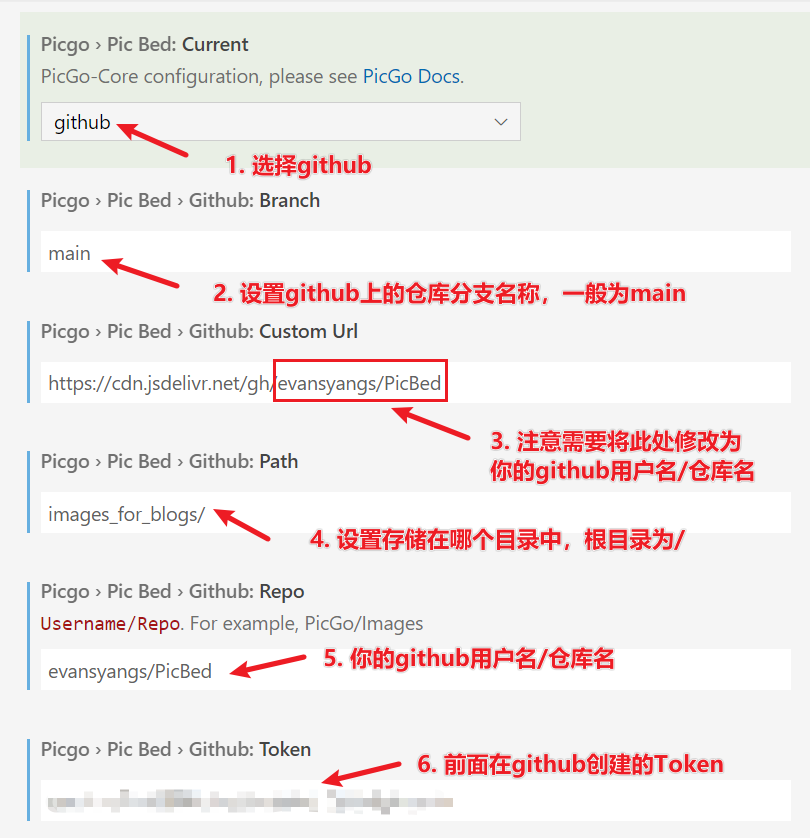
Step3: 插件设置
安装完成后,点击上图中齿轮状的设置按钮,按照下图进行参数设置。
提示
此处使用了JSDelivr来免费加速Github的静态资源访问。
Step4: 更多自定义设置
点击查看
通过下方的自定义设置来实现更强的自动化功能:
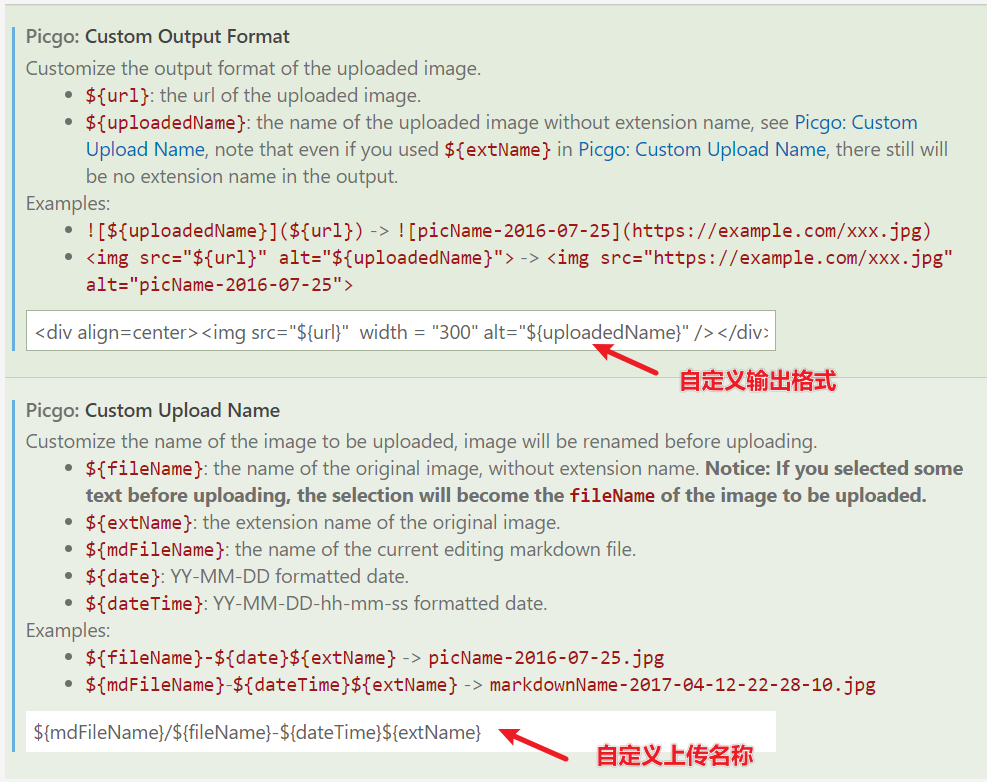
- 自定义输出格式
自动实现图片居中、固定宽度的功能。
<div align=center><img src="${url}" width = "350" alt="${uploadedName}" /></div>
- 自定义上传名称
自动分类到当前Mardown文件名称的目录下、记录上传的时间。
${mdFileName}/${fileName}-${dateTime}${extName}
# 使用
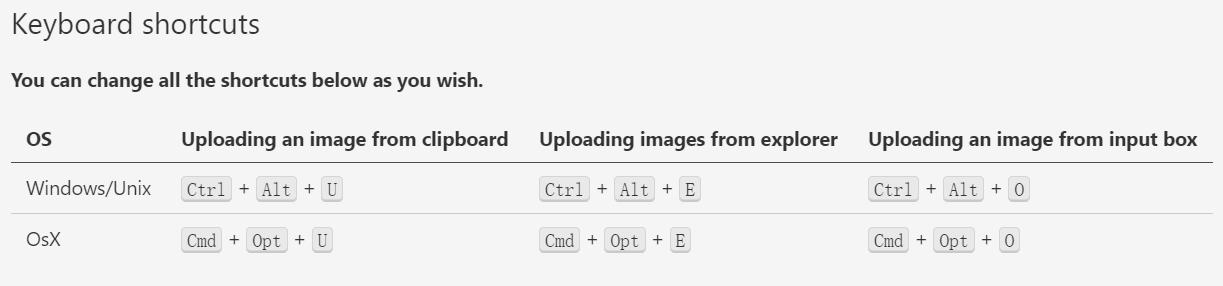
我主要使用两个快捷键:
Ctrl+Alt+E: 从文件夹中选择图片上传。Ctrl+Alt+U: 上传剪贴板上复制的图片。